Lesson 3 - Add Key dots to Image
By now you have two images loaded into the picture boxes in the main Fun Morph window. The next step in creating your morph is to place dots on both of your images in order to define how the morph will operate.
1. Add a dot to Image 1 by clicking on the Dot +.
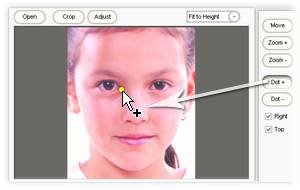
2. Dragging the mouse to where the dot should be located on Image1, and releasing your mouse button (and thus, the dot) on that location. In this example, we'll start by placing dots around the eye of both images, as it's good to place dots around major image elements (for morphing images of faces, examples of major elements include mouth, nose, mouth, etc.) that appear in both Image 1 and Image 2.
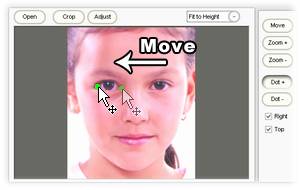
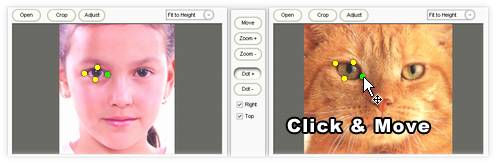
3. When you move the cursor directly over a dot on Image 2, the cursor will become a 4 way arrow to indicate that the dot can now be dragged. You may drag it to the position corresponding to the partner dot's location. Notice that the movie morph will change accordingly as each key dot is created or moved. This synchronous change is great for checking if the location of a dot is correct. The more you add, the better the alignment and the better the morph will be.
|

